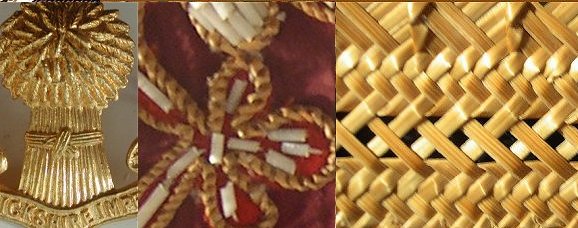
Tied Straw Christmas Tree
You will need:
Tools
- Template
- cork board
- straight pins
- Sharp scissors
Click here to download the
template using Acrobat Reader software.
Materials
- 5 long straws (medium) without heads, tempered (soaked until they can be bent without cracking or splitting)
- Double knitting wool: 1 length red, 1 length green 22ins(56cms) long
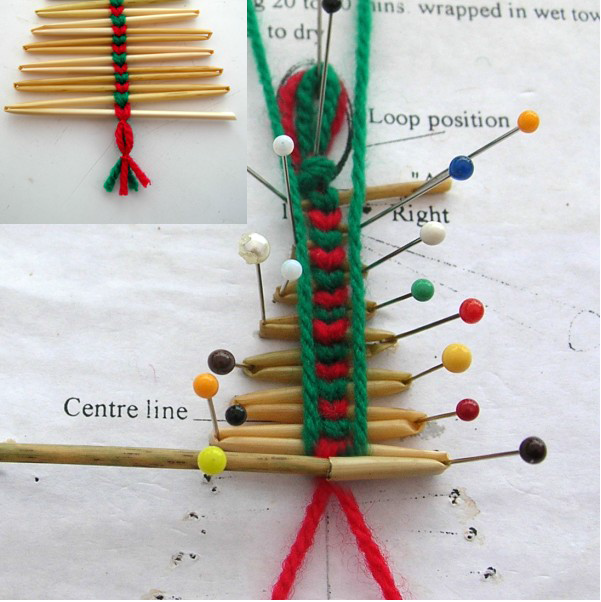
Making a tied straw Christmas tree
- Step 1
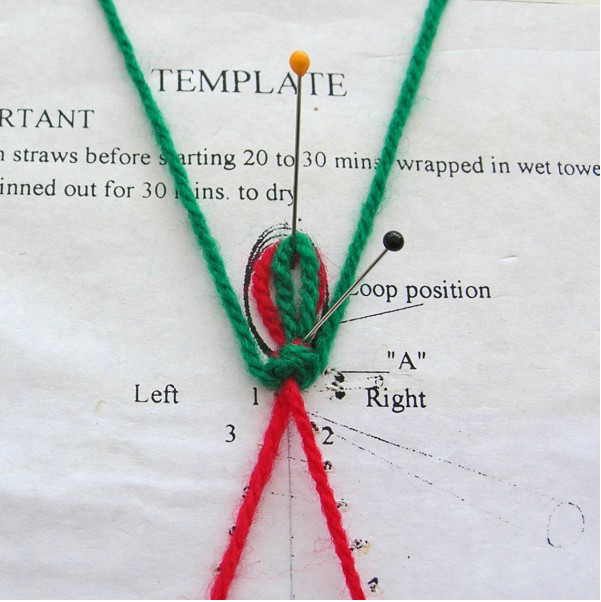
- Pin the paper template to cork board.
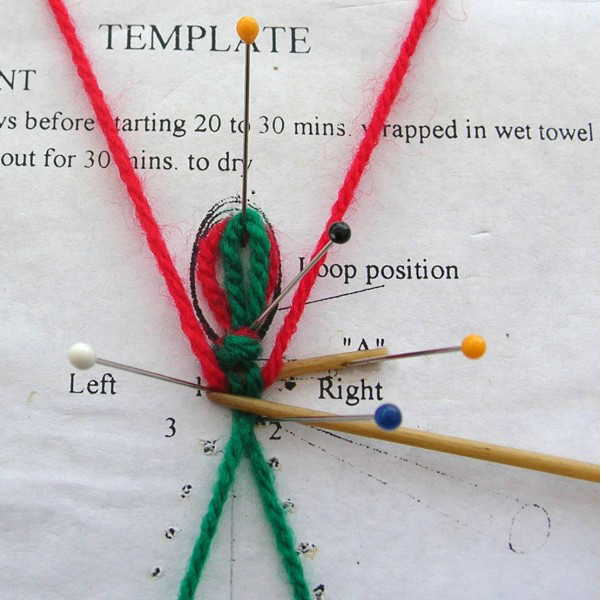
Tie the two pieces of coloured wool together in a loop at their halfway point.
Pin down top of loop to secure; and put another pin into the knot
- Step 2

-
Place the two green ends up either side of the loop; take the two red ends down to lie each side of the centre line.
Lay the thin end of a straw under the knot, across the red wool; pin the thin end to secure.
Place a pin under the straw into the first hole on the left.
- Step 3
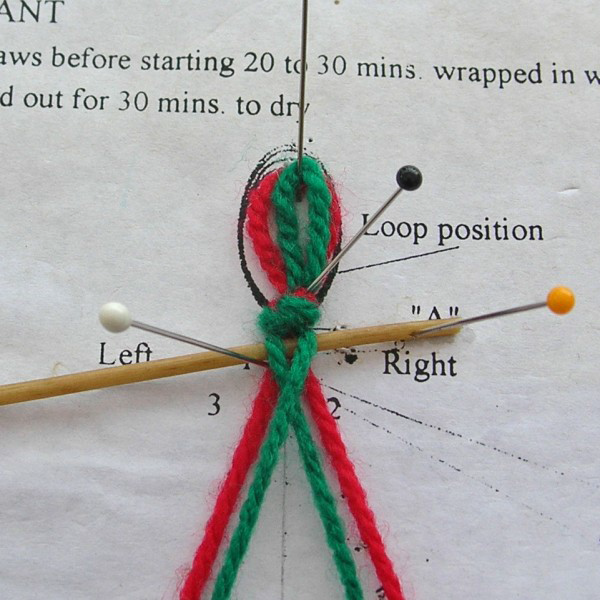
-
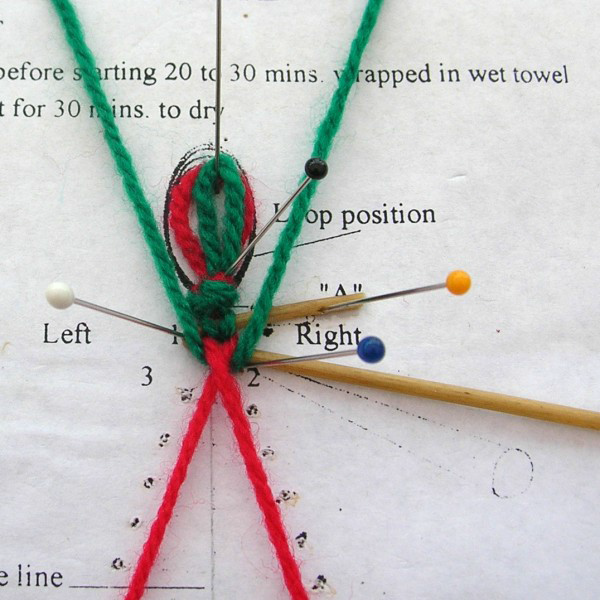
Now bring the two green ends down over the straw to lie between the red ends, crossing them over.
- Step 4
-
Take the two red ends straight up to lie each side of the top knot and loop.
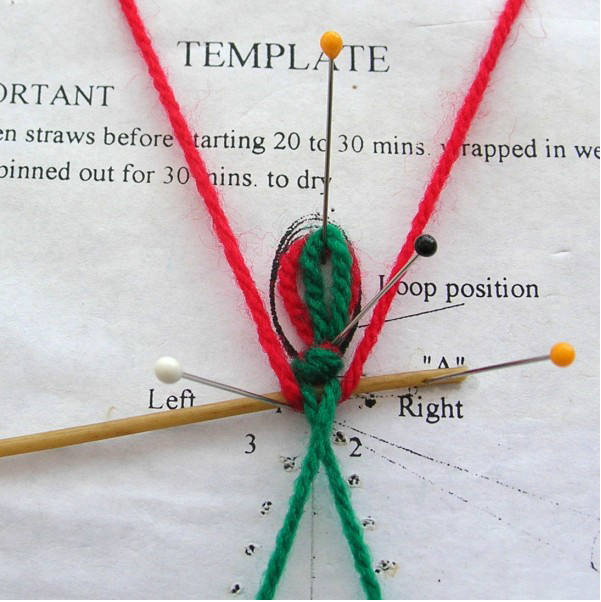
- Step 5
-
Now bend the left hand straw around the first pin, bring across the wool to lie above the top hole on the right, putting a pin in underneath the straw to hold it.
- Step 6
-
Repeat movements 3 and 4 with the wool.
- Step 7
-
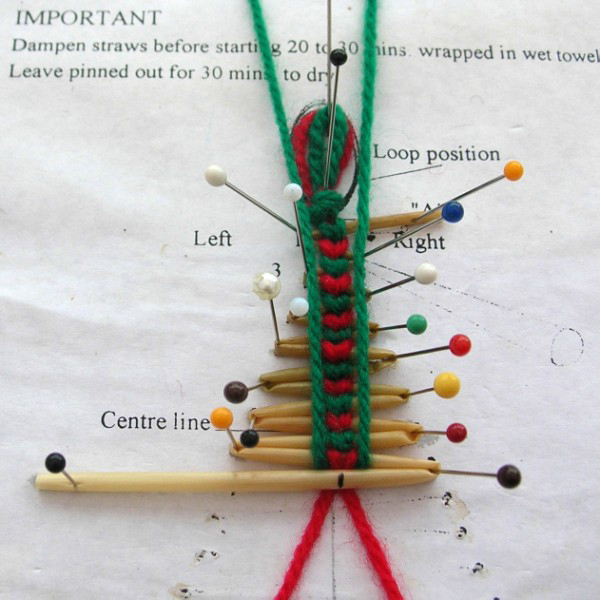
Joining When your straw gets short, cut it in line with the centre line.
- Step 8
-
Place the thin end of a new straw into the cut end of previous straw.
Your next cross over movements with the wool will cover the join.
- Step 9
-
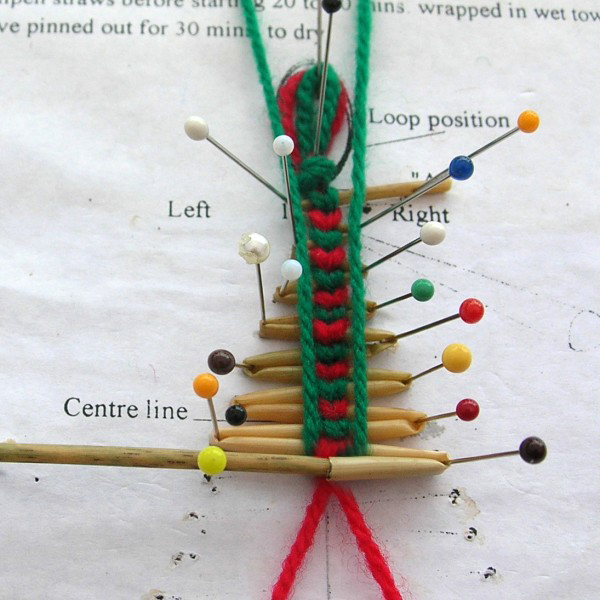
Continue folding straws across until your tree is as big as you want it.
Then knot together all the wool ends decoratively.
Trim the last straw in line with the tree shape.
TIP: When you see an uncovered straw, you know you have to tie it in with the woollen cross over movements.
Straw Suppliers
Use this link to get a list of
Straw Suppliers who may be able to supply you with the straw that is suitable for plaiting.
Click here to download a
printable version of this project using Acrobat Reader software.
If you do not have Acrobat Reader software then you may download the free program by clicking on the icon below: